I LOVE hats! I wish more ladies would wear hats.
Men and boys can wear their baseball caps, but ladies, well, I think we can do better. 🙂
I have my “workhorse” straw hat that goes with me everywhere but I needed a light summer hat to wear with a summer dress. I had my eyes on the “Picture Hat” pattern from the book “A Gathering of Lace” for quite a while already.
But there was always something else coming up so that it got pushed out, and pushed out… so when the 1st Denver County Fair was announced, I entered the hat for the knitting competition to give myself a deadline: last drop off date – July 28. And what a deadline this was!
I entered a day before the registration closed (July 17) with no sts cast on or yarn picked out… hm, just a little pressure there… Because I also needed to take into account that the hat needed to be starched, blocked, dried and embellished…the actual knitting time would come down to about a week. Eeks! And with all the other obligations… keep on dreaming…oh, well, luckily it was only $5 entry fee…
But you know what, the pattern is very smooth flowing, easy to remember and if you work on it every day for a bit, it comes together very quickly. Yippee, I needed that!
I had picked out a natural colored bamboo yarn (Aunt Lydia’s Bamboo Crochet Thread Size #10) from my stash and worked on a set of US #3 (3.25 mm) dpns. The yarn was so smooth and soft and easy on the hands that I was starting to wonder how to stiffen it…
By July 24, the knitting for the hat was finished, right on track for the deadline with even a bit to spare…or so I thought. It used up just that one ball of yarn, ~ 300 yds.
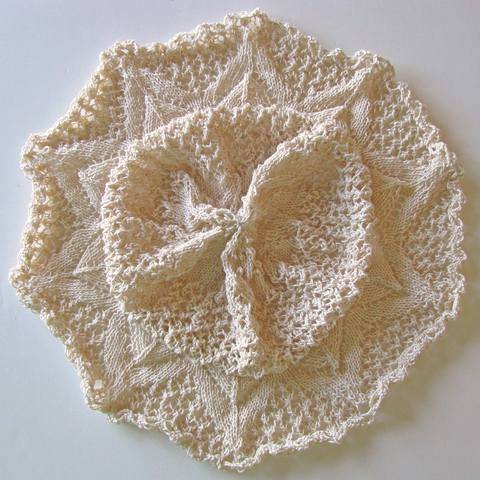
I knit the whole hat on dpns (didn’t have a circular in the right size), with 2 flower petals per needle = 5 dpns and a 6th needle to work with. That worked out surprisingly well – well, it had to as I didn’t have the time to be picky.
I did make a couple of pattern changes along the way:
Pattern change 1: After Rnd 42, I worked Rnds 35 – 42 2 more times to get a deeper hat part (~4.5” tall).
Pattern change 2: I needed 6 chain sts instead of the suggested 3 sts per arch to crochet off the edging so that it didn’t pull. I used a US C-2 (2.75 mm) crochet hook for that.
Then came the challenge of how to stiffen and block the hat… After reading the book’s instructions, Ravlery comments and surfing the web to gauge what my options were, I decided to go with my own idea: I’ve used fabric stiffeners for 3-D snowflakes and crocheted angles in the past very successfully so why not for this hat? And I still had half a bottle sitting around somewhere…
Finding a suitable blocking setup up was a bit tricky. At first I thought of purchasing a Styrofoam sheet, cutting out round shapes and stacking them to block the hat box, but after seeing the price tag on Styrofoam and thinking of the mess when cutting it, I went low tech: a grabbed my favorite hat, plastic wrapped it, stuffed it and there you had it.
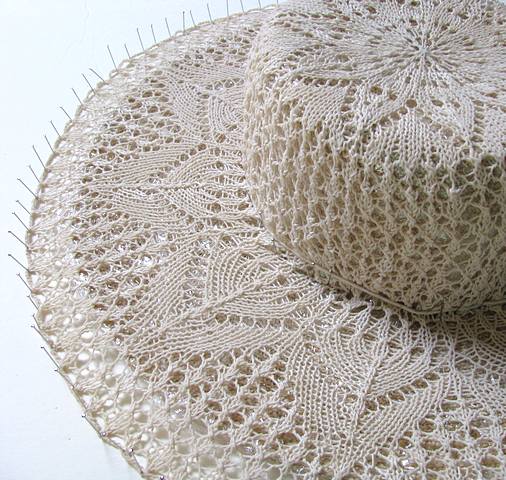
I used the fabric stiffener at full strength (Stiffy from Hobby Lobby, ~$6 for 16 oz. bottle) and needed about 3 oz for the hat.
The weather was so hot that the fabric stiffener started to dry as I was pinning the hat! Gotta work faster!!!
After drying overnight, the hat was VERY stiff. Good. Now, how shall I embellish the hat and finish it off? Wouldn’t this be a perfect opportunity to try out some knit flower patterns?
I was down to the last 2 1/2 days and I was going to be out of town for one of them… off to the Cheyenne Frontier Days. I can highly recommend this event, especially if you go on the Wednesday with the Pancake Breakfast and air show.
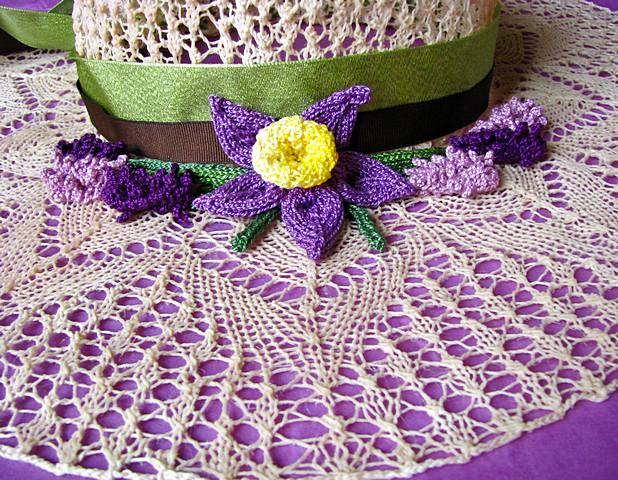
So I took 2 flower books with me for the trip to Cheyenne and was trying out different flower designs during the drive (I was a passenger of course!). I used Perle Cotton #5 on US #0 (2 mm) needles. After knitting, what felt like, a whole flower bouquet of various styles and sizes, I finally settled on a Daffodil-looking design and Lavender flower shapes. The Daffodil petals would mirror nicely the lace flower petals and the Lavender added elongated, interesting textured filler shapes without overpowering the rest.
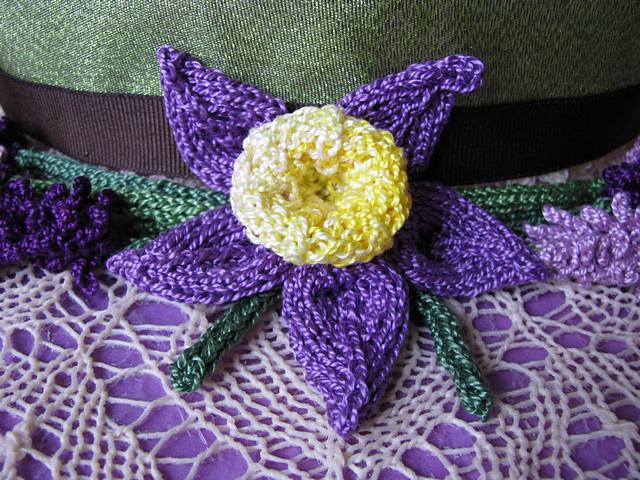
I have to say, the flowers nearly took as long as the hat – or so it felt. Once I settled on the flower designs it went pretty quickly but until I had the right ones… it took forever and I could feel the time ticking away.
It was coming down to the wire. On the day of the final drop off period, it was time to assemble the hat. Some purple tissue paper from a yarn shipment from Darn Good Yarns as the background, an old foam core project board from my kids as the mounting board, leftover ribbon from some leis for the hat band and sewing on the flowers. I can handle that!
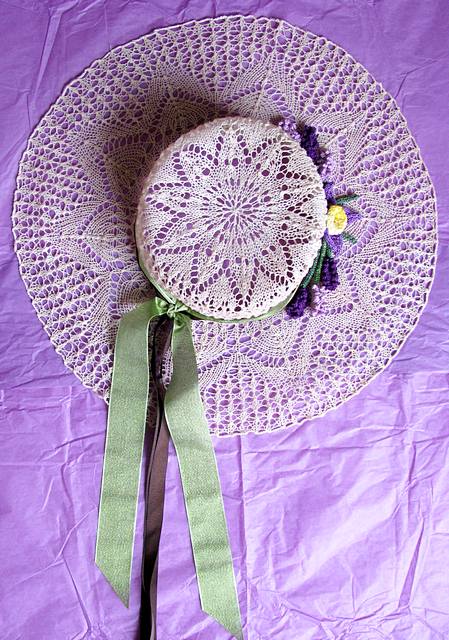
Drop off time: 2:35 pm – hey, I had a bit more than 20 minutes to spare to make the deadline! 🙂
To wear it, you definitely need a ribbon band on the inside edge or else you will feel some pretty sharp points poking and scratching you. I “massaged” some of the more stubborn tips and was able to soften them enough to smooth out the wear… now I understand why most better straw hats have that inside ribbon… 🙂
I really LOVE how this hat turned out. It makes me feel quite special and it sure is a great conversation starter… and perhaps more ladies will consider wearing a hat…?
Edit: My hat didn’t place and was beaten by a feather and fan scarf because I was told that they weren’t sure if the hat was hand knit and only judged the knitted flowers…well, I guess that is a really nice complement, sort of… 😉 Note to self: be present during judging in case there are questions…


Leave a Reply